Donna The Astronomer gives her tips on how to photograph a meteor shower with your Smartphone

Donna Burton
24 October 2025, 6:40 AM
 The Perseids Meteor Shower. NASA/Preston Dyches
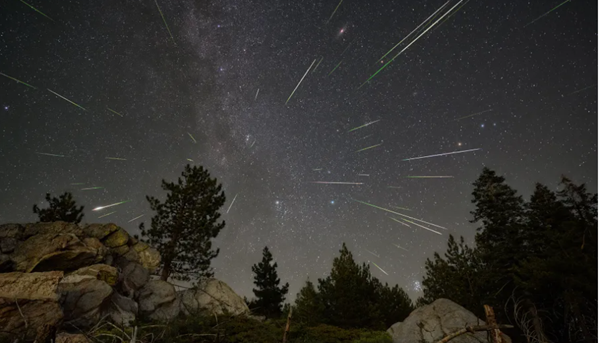
Meteor showers are among the most accessible and awe-inspiring celestial events for amateur astronomers and night sky enthusiasts.
While professional astrophotographers use specialised equipment, it is entirely possible to capture meteors using a smartphone — provided you prepare carefully and understand the limitations and strengths of your device.
Equipment and Settings
Tripod - A tripod is essential.
Long-exposure photography requires absolute stability, and even the slightest movement can blur your image.
If you don’t have a tripod, placing your phone on a stable surface and using a weighted object to hold it in place can be a temporary alternative.
Long Exposure - Most modern smartphones offer a night mode that automatically adjusts exposure time.
For more control, apps like NightCap Camera (iOS) or Camera FV-5 (Android) allow you to manually set exposure times up to 15 or 30 seconds.
Longer exposures increase the chance of capturing a meteor streaking across the sky.
Manual Focus - Set your focus to infinity.
This ensures stars and meteors remain sharp. On some phones, this can be done in pro mode or via third-party apps.
Autofocus tends to struggle in low light and may focus on nearby objects or the dark sky itself.
Manual or Pro Mode - If your phone supports manual controls, adjust the following:
- ISO: Start with ISO 800–1600. Higher ISO increases sensitivity but also noise.
- Shutter Speed: Try 10–30 seconds. Longer exposures gather more light but may also capture star trails.
- White Balance: Set to daylight or manually adjust to avoid unnatural colour casts.
RAW Format - Shooting in RAW preserves more image data, which is useful for post-processing. Apps like Adobe Lightroom Mobile or Halide (iOS) support RAW capture.
Disable HDR and Zoom - HDR is designed for daylight scenes and can interfere with low-light performance. Digital zoom reduces image quality and should be avoided. Instead, crop your image later if needed.
Use a Timer or Remote Shutter - To prevent camera shake, use a 3–10 second timer or a Bluetooth remote shutter. This ensures the phone remains perfectly still when the exposure begins.
Location and Timing
Find a Dark Location - Light pollution is the biggest obstacle to meteor photography.
Use light pollution maps (e.g. Dark Site Finder or Clear Outside) to locate dark-sky areas. National parks, rural properties, and coastal regions often offer excellent conditions.
Plan Ahead - Meteor showers have radiant points — the area of the sky from which meteors appear to originate.
Use apps like Sky Safari, Stellarium, or Star Walk to locate the radiant and plan your framing. For example, the Orionids radiate from the constellation Orion, which rises in the east after midnight.
Check the Weather and Moon Phase - Cloud cover and moonlight can significantly affect visibility. A clear, moonless night is ideal.
Check forecasts for cloud cover, humidity, and wind. The moon phase also matters — a full moon can wash out faint meteors, while a new moon offers optimal darkness.
Arrive Early and Prepare - Get to your location before sunset to set up your gear, test your settings, and allow your eyes to adjust to the dark.
Bring warm clothing, a torch with a red filter, and extra batteries or power banks for your phone.
Additional Tips
- Frame Wide: Use the widest lens available on your phone to capture more sky. Meteors can appear anywhere, so a wide field increases your chances.
- Take Multiple Shots: Meteors are unpredictable. Use interval shooting or burst mode to take continuous exposures over time.
- Post-Processing: Use apps like Lightroom or Snapseed to adjust contrast, reduce noise, and enhance detail. RAW files offer more flexibility for editing.
Final Thoughts
Photographing a meteor shower with a smartphone is both a technical challenge and a creative opportunity.
It requires patience, planning and a willingness to experiment.
As a science communicator, I often say that the best camera is the one you have — and with the right approach, even a phone can capture the magic of the night sky.
So, will you be heading out for the next meteor shower? And if you do, what story will your image tell?